Instantly add your resources to PowerPoint
Export InPrint 4 documents as slideshow presentations

Presentation Export allows you to export documents created in InPrint 4 as slideshow presentations. These presentations can be opened with Microsoft PowerPoint, Google Slides, and other presentation software.
Get Presentation Export FAQsAdd Symbols to Your Presentations From InPrint 4

Symbol Presentations
Create symbol presentations to support classroom activities, assemblies, quizzes, and more.

Export to Leading Titles
Open your projects in Microsoft PowerPoint, Google slides and other presentation software.
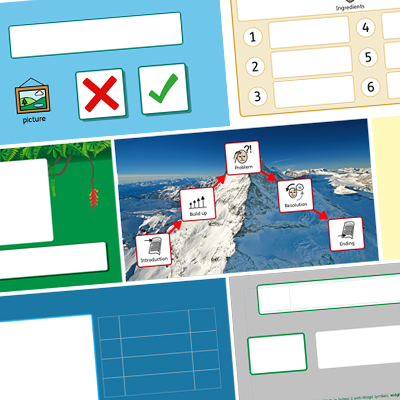
Editable Templates
Use over 80 editable templates and example resources as the perfect starting point for your projects.
Example Presentations and Templates
Presentation Export comes with over 80 example presentations which can be exported directly into your chosen presentation software or edited to include your own content and designs.
Each example presentation comes with a corresponding template which can be used to make a similar resource from scratch.

FAQs
-
 How do I export a document as a slideshow presentation?
- Go to the File Tab and/or click Print
- Click the Export Presentation button
- Choose a location and click Export
- The presentation will be saved and open in your presentation software
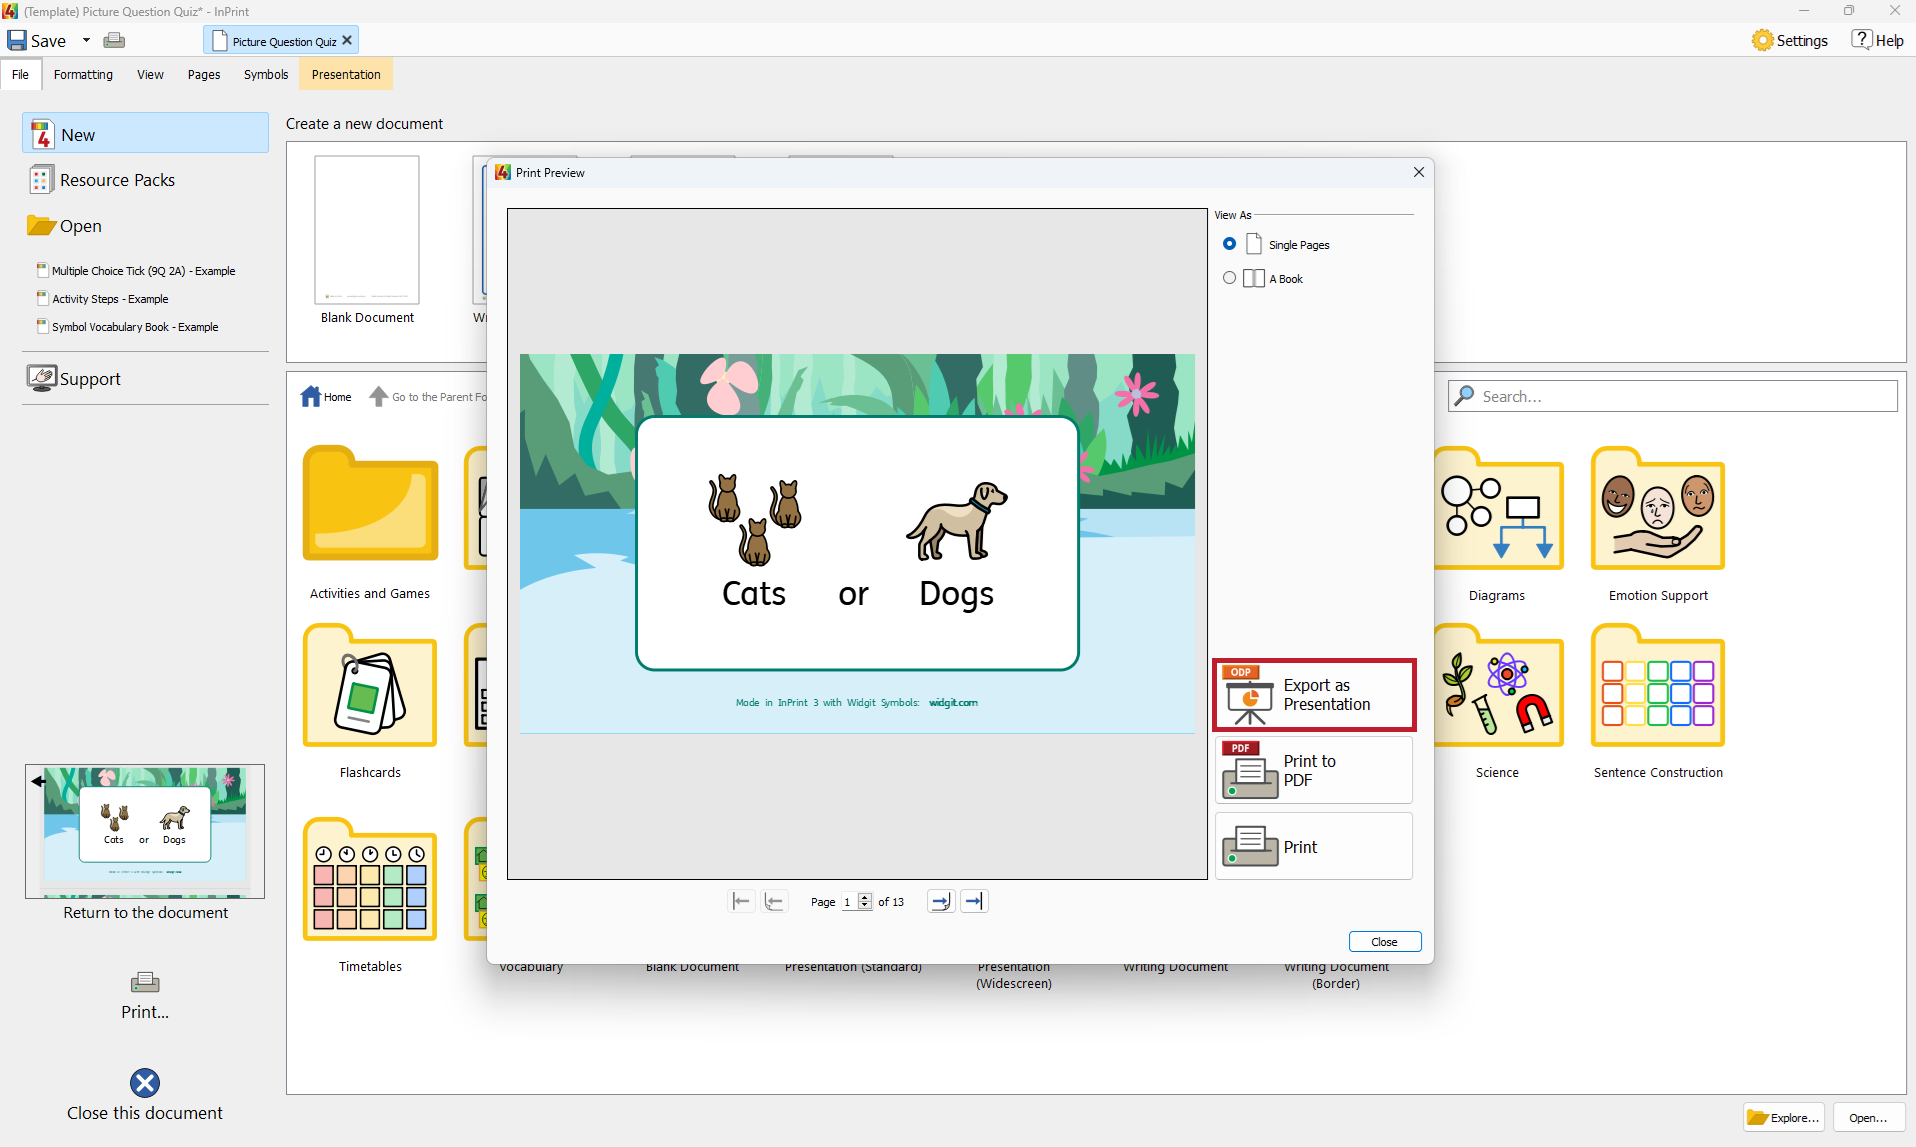
If you do not see the Export Presentation button, ensure that you have a presentation paper size set:
- Go to the Pages Tab
- Select Paper Size
- Ensure that the Widescreen Presentation 16x9 or Standard Presentation 4x3 paper size is selected
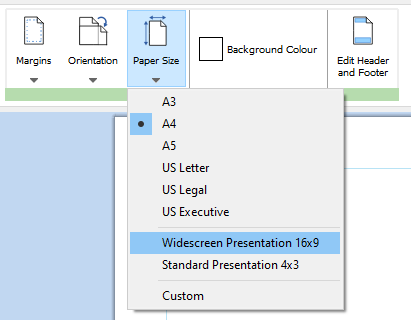
 If you do not see any presentation paper sizes, you may not be on the correct subscription tier. Contact our support team for help.
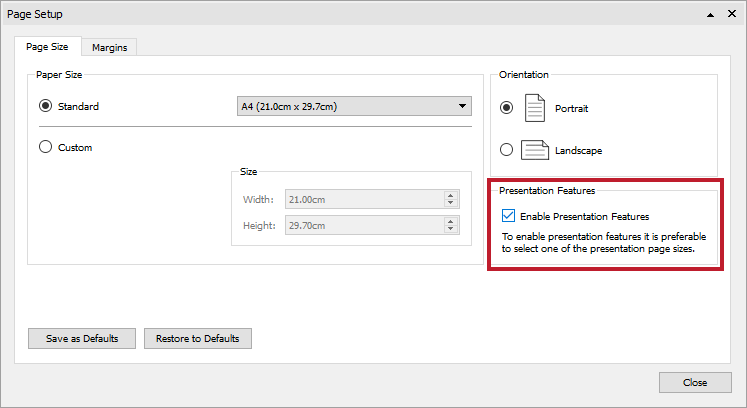
 You can manually switch a document to enable presentation features without changing your paper size.
To do this:
- Go to the Pages Tab
- Select Paper Size
- Click Custom
- In the Page Setup dialog, check the Enable Presentation Features checkbox
-
 Can I import presentation files into InPrint 4?
Presentation Export allows you to export InPrint 4 documents into slideshow presentation documents (.odp files). These presentation documents can be opened in Microsoft PowerPoint, Google Slides, and other presentation software.
You are unable to import a slideshow presentation file, once exported, into InPrint 4.
When you export an InPrint 4 document, it will also prompt you to save the InPrint 4 document. You can open the saved InPrint 4 document after you have exported, make changes, and export again.
-
 How do I change or add a background image in a presentation?
Presentation Export comes with new Widgit Media for buttons and background images, accessible from the Image Library. Some templates and example resources use these new Widgit Media.
Background images can be placed in the Header and Footer so they appear on each slide.
To add or change a background image:
- Go to the Pages Tab
- Click Edit Header and Footer to open the Header and Footer
- In the Image Library, navigate, by clicking on each folder, to:
- Widgit Media / Presentations / Backgrounds / 4:3, or
- Widgit Media / Presentations / Backgrounds / 16:9
- Navigate through the different images until you find the one you want to use
- Click and drag the image over a slide, so that the image snaps to the edges of the slide
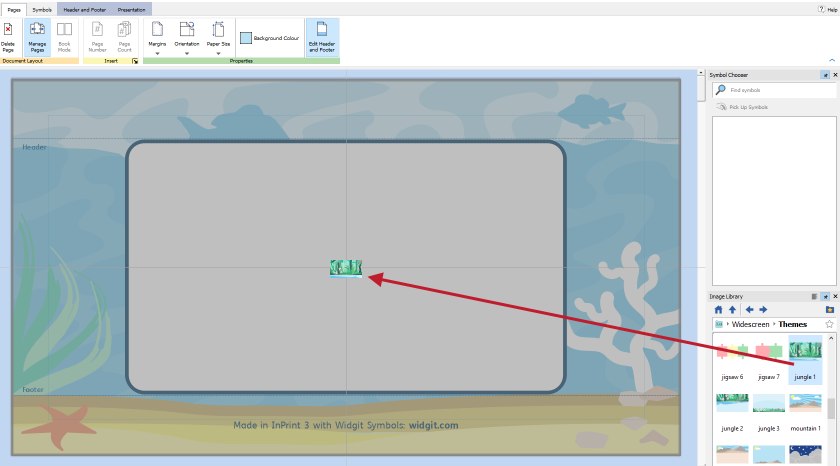
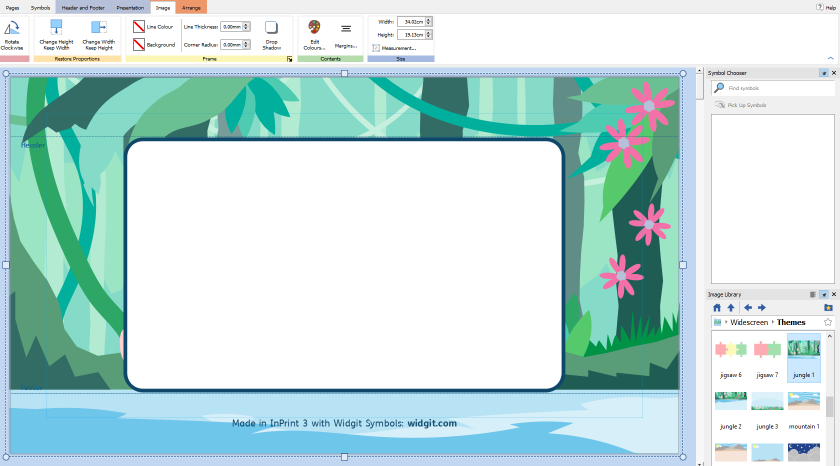
If you are not using standard presentation slide sizes, you will need to resize the images for your document.
-
 How do I add buttons to my presentation?
Presentation Export comes with new Widgit Media for buttons and background images, accessible from the Image Library.
Buttons can be used as navigators between slides, by adding an image of a button to a slide and then creating a link to another slide.
To add a button image to your document:
- In the Image Library, navigate, by clicking on each folder, to:
- Widgit Media / Presentations / Buttons
- Find the button image you want to use in one of the many folders
- Click and drag the button image onto your slide

You can recolour and rotate button images from the Image Tab. To find out how to add a link to another slide, see How do I add a link between slides?.
- In the Image Library, navigate, by clicking on each folder, to:
-
 How do I add a link between slides?
When you play an exported InPrint 4 presentation document, in your presentation software, clicking anywhere on a slide will automatically take you to the next slide in the document.
Links allow you to set an object, when pressed, to move to any other slide in your document. This can be useful when you want a single slide to navigate to multiple places.
To add a link to an object:
- Add, or find, an object that you want to use as your link
- This can be any InPrint 4 object, such as an image, frame, or table
- Select the object
- Go to the Presentation Tab
- Click Add Link To Slide
- Select the slide you want to link to
- You can choose Next, Previous, First, Last, Last Viewed, or a specific slide number
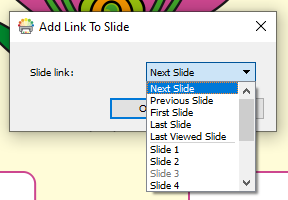
- Click OK
An indicator will appear on the object, when it selected, to let you know which slide it links to.

You can edit the link from the Presentation Tab by clicking Edit Link or remove the link by clicking Remove Link.
You can also set a link to a webpage instead of a slide. You can do this from the Linking dialog.
- Add, or find, an object that you want to use as your link
Hints and Tips
-
 Managing slides in InPrint 4
Presentation Export makes use of the Page Manager by displaying it vertically, on the left-hand side of the document. This allows you to more easily manage slides. You can rearrange, add, duplicate, or remove slides from the Page Manager.
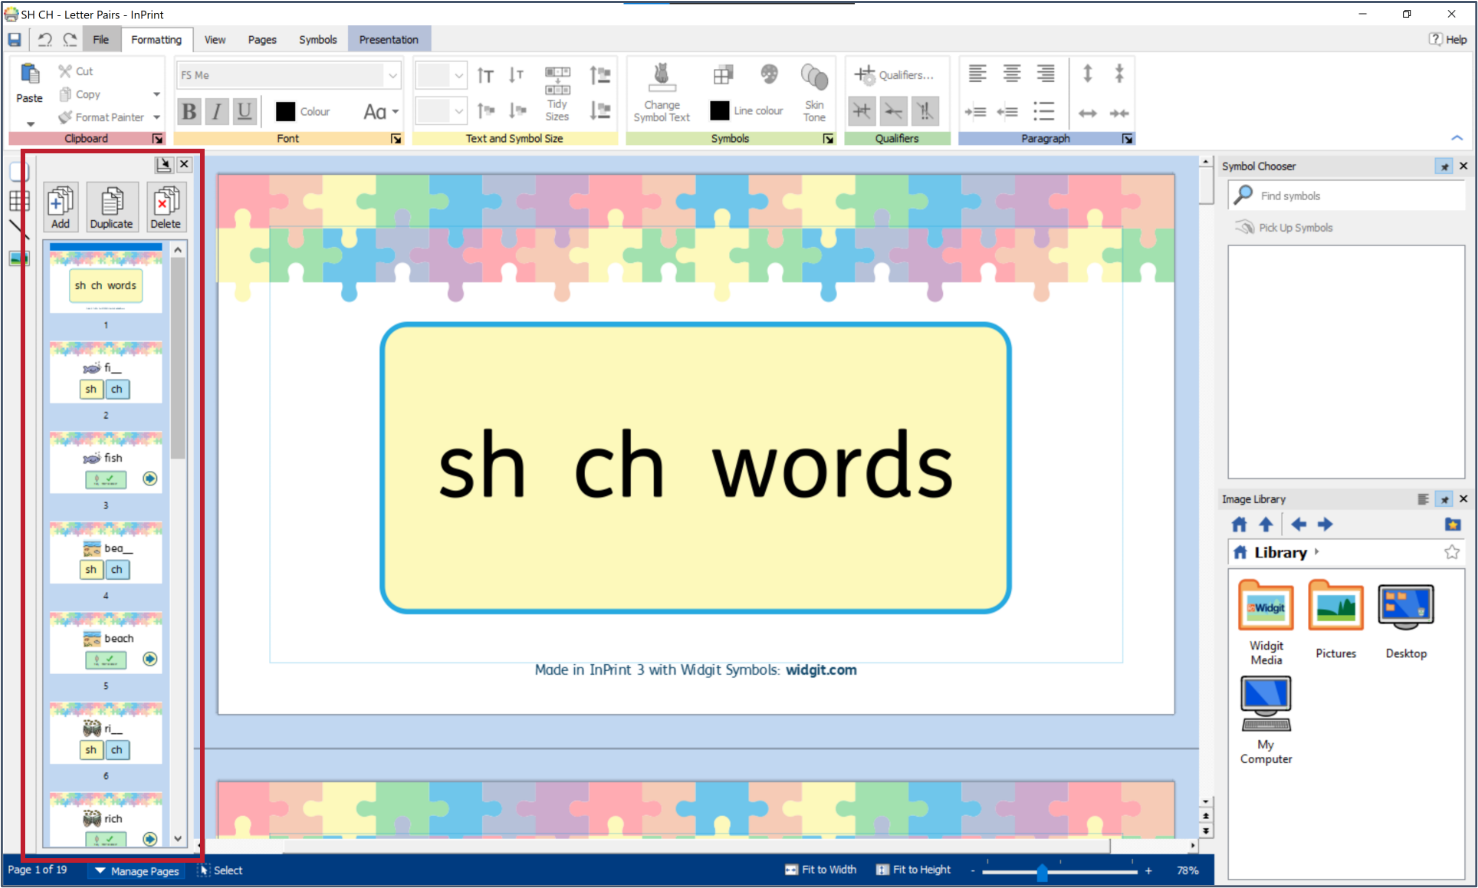
Adding slides
To add a new slide, click the Add button. This will add a new slide after your currently selected slide. If you are using a presentation template, your new slide may contain template content, for example, blank frames with the same style for your template.
Moving slides
To move a slide, hold left-click on the slide and drag to a new location. A bar will appear to let you know where this page will be moved to. Letting go of the mouse click will move the slide to the new location. You can move multiple slides by multiply selecting them with the CTRL key.
When moving slides in your document, objects with links will automatically update to the correct slide, for example, if you have an object that links to slide 3 and you move slide 3 to be further along your presentation, the object will link to the new location of the slide.
Duplicating slides
You may want to duplicate sets of slides. To do this, select multiple slides in the Page Manager by holding down the CTRL key and left-clicking each slide. Click the Duplicate button on the Page Manager to duplicate this selection of slides. The selection does not need to be continuous, for example, you can select slides 1, 4, 6, and 7 and duplciate them. If you do, it will create 4 new slides after the last selected slide.
Duplicating slides in quiz templates
When using the templates such as the quiz template in the picture above, you may have question and answer slides that link to each other. If you want to add a new question and answer, you will want to duplicate a set of slides. When you do this, the links between the slides remain, making it easy to add new questions and answers to your document.
-
 Pasting in place
You can copy and paste objects to the same location on another slide using the Paste in Place feature.
To do this:
- Select the object(s) you want to copy
- Copy the objects using CTRL+C (or by clicking the Copy button on the Formatting Tab)
- Select the slide you want to copy your object(s) to
- Paste the object using CTRL+SHIFT+P (or by clicking the Paste in Place button in the clipboard section of the Formatting Tab by clicking the down-facing arrow on the Paste button)
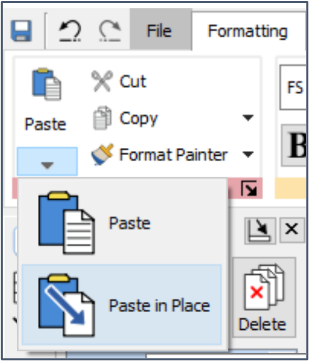
This will paste the object onto the new slide at the same location as it was copied from. This can be helpful when copying slide navigation, such as next and previous buttons, to the exact same location on multiple slides.
-
 Adding a border to an image
You may want to add a border to an image. To do this:
- Create an empty frame
- Drop an image into the frame
- Go to the Image Frame Tab
- Click the Fit to Content button to resize the frame to the size of the image
- Click on the Margins button
- Set the margins to be 0.0mm
- Change the line thickness, colour, and corner radius

-
 Align and distribute
You can use the Align and Distribute buttons on the Arrange Tab to quickly organise and layout a multiple selection of objects.
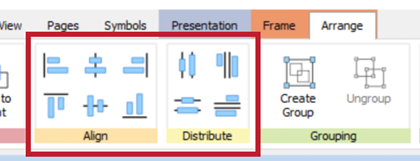
Align
You can align items to the left, top, middle (horizontally and vertically), right, and bottom with a single click, for example, these objects are aligned to their bottom-most point:

Distribute
You can distribute items evenly, vertically or horizontally and from their centre points or edges, for example, these objects are distributed evenly from their edges:

-
 Frame sizing types
Frames and cells have Sizing Types. They set how a frame or cell acts when you add or remove text. You can modify the sizing type from the Frame or Cells Tab.
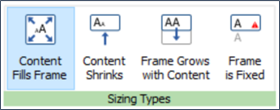
Content Fills Frame
In this mode, the content will fill as much of the frame as possible. As you increase or decrease the size of the frame or cell, the content will always be the biggest it can be. This mode is great when making flashcards.

Content Shrinks
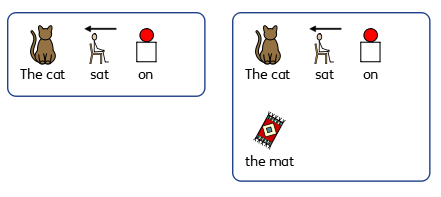
In this mode, content will shrink to fit in the frame or cell. If you add more text, the text and symbol size will decrease. If you make the frame or cell larger, the content will only grow to the original size. The content will not grow beyond the original size when the sizing type was set. This is good when you have a specific size for your content but you are unsure on the size of the frame.

Frame Grows with Content
In this mode, as you type the frame will grow in size, vertically. If you remove content, the frame will shrink back to the original size. This is the default sizing type for Frames and is good when writing long sentences. This sizing type is unavailable for cells in a table.
Frame is Fixed
In this mode, the text size, symbol size, and frame or cell size never changes. If the content will not fit in the size of the frame or cell, the content will be hidden and an indicator will appear to tell you that the frame contains content that cannot be seen.

-
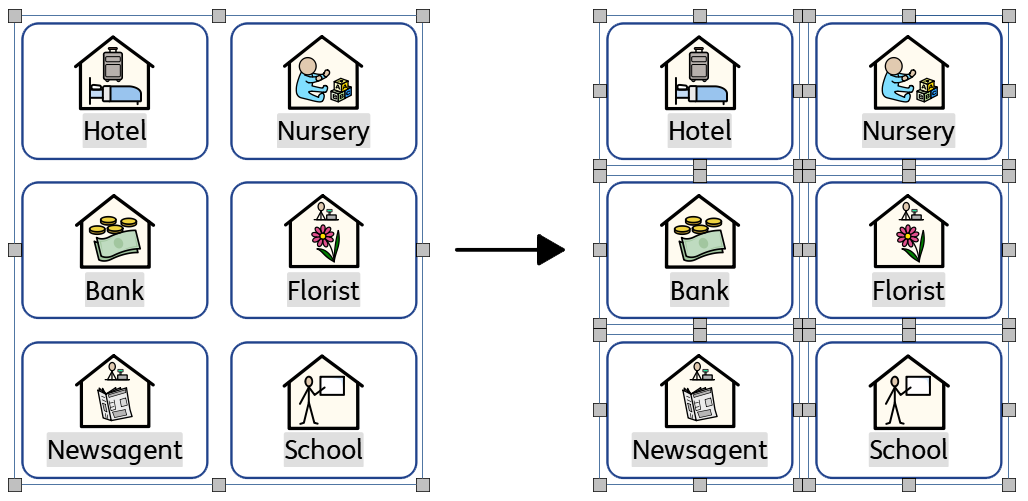
 Splitting tables into frames
You can convert a table into individual frames from the Table Layout or Arrange Tab.
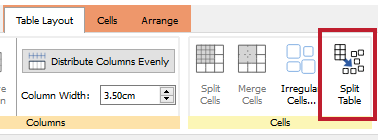
- Select a table
- Go to the Table Layout or Arrange Tab
- Click the Split Table button
This can be useful if you want to link a specific table cell to another slide. You are unable to add links to table cells. Once split into frames, you can add a link to one of the individual frames.
-
 Getting started with Presentation Export - PDF
This PDF can be downloaded to help new users get started with Presentaion Export. It outlines the simple steps required to open, export and modify example resources.
What do users think of the Presentation Export feature?
"As a teacher in a classroom setting, I would use it for my whole class teaching on my interactive whiteboard. I would then use it during continuous provision to build on learning. "
"A really nice additional feature, So versatile and easy to use. "
"I wish that this had been in place when I was teaching in my specialist setting. It would have saved me A LOT of time snipping symbols into presentations."
"Perfect for creating a bank of quizzes in line with specific topics to use in class."
"I have used it to create simple recipes during life skills lessons. "
How to get Presentation Export
Presentation Export is available to to all InPrint 4 subscribers on Standard, Pro and Site plans.
How to keep updated
To ensure you and your colleagues receive important updates about Widgit , including access to free resources and new features like Presentation Export, please register to receive our email journal here.
